Thursday, April 28, 2016

Living Battlefields: Add Life To Your Base.

We have all seen a wide assortment of based miniatures over time, ranging from just black primer to intricate dioramas.  These more advanced bases can look challenging to create, but with a little time and care (and some affordable materials) we can give our models interesting landscapes upon which to stand.  With a few easy steps you can take even the most simply painted model and bring it to life.
I always build my base from the ground up up around a fully painted miniature (some will argue to base first,) giving it a layered appearance.  I will discuss each layer briefly, however full tutorials on specific techniques may follow.  This tutorial will focus more on materials and basic techniques to inspire your own creations!

Citadel Astrogrante, Nuln Oil, and Celestra Grey (and a Necron head).

1) Textured Earth (or Mars, etc).

After priming the base, the first thing we want is a textured ground of dirt, rock, ash, etc.  The simplest way to do this is with Citadel Texture paints.  These are basically very thick paints with coarse material already mixed in, and they come in variety of colors and textures.  My favorite is Stirland Mud, which is Brown and gritty, especially if you are going to move on and add grass effects.  If you want a quick and easy grass, however, use Lustrian Undergrowth.  I use Astrogranite for my Space Marines to give the base a burnt wasteland or urban rubble look.  Whichever you use, take two more steps to make it pop!

First apply a liberal coating of your favorite color-appropriate wash, and then dry-brush with a complementary color that is lighter than the texture.  This will really highlight the texture. 
Now, you have a nice shaded and highlighted base with texture.  In other words, ground.  I used to stop here and was happy, but I have found that when you start adding more on top of the ground it makes a world of difference.

There are many other methods to create the ground, the most common being the application of sand, cat litter (unused!) or model railroad ballast to the base.  These all start with coating a primed and painted base in watered down PVA glue, then sliding it into a tub of your material and letting it set.  Knock and blow off the excess.  Ballast even comes in a variety of colors and coarseness.  I would also, after it sets, dab some very thing glue/water mix in top to seal it in. 

2)  Turf or Short Grass

Here we start to add some interest to our base.  Similar to above with the ballast, you are going to want to apply watered down glue to the base. 

TIP:  Don't cover the whole base!  Leave some random exposed earth, or try applying the flock sparingly.

Now, dip the base into a container of flocking.  This step will be using fine particles of colored sawdust or foam usually sold as "Turf" or just "flocking".  Be careful, though, as flocking is a general term for all sorts of ground cover supplies.
So you have dipped the base in, Now remove it after a while and tap it off.  Instant short grass!  But who mows a battlefield!?

Citadel Stirland Mud, Summer Turf, and Burnt Grass static grass.  There are rocks, coming up in step 4!


3) Long Grass

Okay, this is the step that I feel seperates the men from the boys; or those with and without a delicate hand.  Static grass!  This stuff is fine synthetic fibers that will stand up on the base like real grass.  There are electric applicator gizmos that actually ionize the fibers, but I have a simpler method. 

Tip:  this comes in different colors and lengths, mix and match for a more natural look.
First, apply superglue where you want the grass to be.  I apply this on top of the turf, either in clump or covering about 80% of it.  You don't want to cover it all because you are going for the look of mixed lengths of flora.

Now, using tweezers, drop big clumps on top of the glue.  Use a lot more than you think you need, it won't all stick.  Do not push down on it or it won't stand up!  Push it around a little from the sides, about a millimeter in several directions.  Now, after about 5 seconds have passed, tap it off into a piece of card or paper to save the excess.  Now gently blow on it from the side, rotating the model, and it will stand up! 

Tip:  Don't blow towards your drop pile or you will have this stuff everywhere.  Don't sneeze or cough on it either, and turn off any fans.

A mixture of ground and coarse clay cat litter, Citadel XV-88, Agrax Earthshade, and Tallarn Sand.


4)  Rocks
I actually do this step before the grass because there is paint involved, but I decided to get the turf mentioned first.  This is pretty easy and there are a lot of options.  I usually just put a small rock or two in a base that is about the size of the model's foot.  In some situations larger rocks may be approoriate, or even huge ones with the model on top!

You can use a lot of stuff here, but here are my favorites:  for gravel or skree, fine or medium ballast or crushed clay cat litter (in clusters or patchs).  For medium sized field rocks small aquarium gravel, coarse clay cat litter, or coarse ballast (individually or small groups).  Larger rocks have a lot of options, from tree bark and cut cork board to actual rocks.

For all of these, you want to color the rock.  I usually do a light grey.  First prime black, then overbrush with a dark grey, leaving the black in the recesses.  Next dry brush with light grey.  Finally you could apply a black ink wash and another dry brush to really accent some texture.  Or, go for some brown for that desert look, like the guys above (mix of crushed and coarse clay cat litter.)

Brown medium ballast, summer turf, burnt grass static grass, golden wheat field grass, and light green clump foliage.


5)  Advanced Flora

If you have done the four steps above, you should have a fine looking grassy field under your mini, maybe even a little rocky one.  Or maybe we did a textured alien landscape.  Either way, you can bring it up a notch with some plants.  There is a lot out there to pick from. 

Longer grass stalks are a pain to make but look great using Field Grass from Woodland Scenics.  This is very fine colored fibers.  What I do is put a small dab of PVA glue on was paper, dip in a clump of the fibers, then cut to length.  Let the glue get thick but not dry, then stick onto the base with a dot of superglue.  Move it around a little to get it to spread out with a hobby knife, and after it is set use some scissors to give it a little trim and make the top uneven (i pull fibers away from the stalk with a knife and then cut.)  

Tip:  You can also get pre-made grass clumps, but they can tend to be a bit expensive for a very limited number of pieces.  With the field grass, you can make quite a bit!

Fighting in Normandy?  Try some clump foliage made for model railroads.  Tear off little pieces and apply to the base for a thick moss.  Use larger pieces or stack them up for bushes and hedges. 

Are we still wondering what to do with that alien landscape?  Get some aquarium plants and trim off some small shoots or fronds and glue them into the base (these may require a stem and some drilling to get them to stick, perhaps with a bit of got glue under the base).

Citadel Stirland Mud, summer turf, burnt grass static grass, and the rocks are a mix of cat litter pieces and aquarium gravel.


After Action Report

There we have it.  The sky really is the limit, and the only bounds are your imagination and dedication.  Mix it up some and use materials of different lengths, shapes, and colors.  This will all give your model a more natural look.  Need inspiration?  Go outside and find some un-mowed grass or underbrush and just see how many different plants you find.  Look at the different shapes and colors.  How are they spread out or clumped together?

Then, I would say take a trip to a store that has model railroad supplies and see what strikes your fancy, and don't forget to pick up some glue!  

Happy hobbying and happy wargaming everybody!

Wednesday, April 20, 2016

New blog header/logo and other news

So you may have noticed the awesome new header/logo that we've acquired! It was done by a local artist here in Asheville, NC. I always wanted to have a logo for this blog, but my artistic talents are only in wordsmithing, miniatures and cartography. So, I looked for an artist. Then through a friend I found "Strawberry Cucumber Studios". She has a Tumblr blog where she posts her art. She's a really talented artist and you should go give her love. Link here.

So I've considered starting a podcast, but never really got around to it. But the idea resurfaced in my boredom today. It might be fun to do a podcast about wargaming using the Trench Monkeys brand(?). But Even then. I'm not really sure.

Hope you all have a good day, and may you always roll sixes, or what ever the largest number on your random number generators is.

Sunday, April 10, 2016

Paint Brush Review: Artist Loft 3/0 Round

I worked on some black-lining on my Zeus battlemech this morning.  Tried out a new Artist Loft brush from Michael's, a 3/0 round.  They were pretty cheap compared to the Windsor & Newton that I usually use, so I thought I'd give them a try.

The belly of the brush itself is very long, but the toe comes to a very fine point which is itself considerable in length.  It took a bit of extra care to control, but the longer belly can hold a lot of paint so it worked out well in this situation where I had the black paint watered down to the consistency of an ink wash (i find for lining the paint leaves a bolder pigment than the ink).

The crimp of the ferrule was glued into the handle.  Yes:  "was".  It fell off about 15 minutes in.  The water had gotten under it and dissolved the glue.  I put a little super glue inside the crimp and replaced it after I was done.  Hopefully it will hold up better next time.

Overall, though, I was happy with the brush.  It might be a bit unwieldy for doing lines on a flat surface, but for filling grooves such as these with thin paint it seems ideally suited.

Thursday, March 31, 2016

Gærstfeld: An imagi-nation.

Imagi-nation:  A historically themed fictional culture and/or political region.

Galen recently posted two articles covering his nation of Odálagaard, which can be found here and here.  This article covers the nation that I am working on to provide an opposing faction in our games of Hail Caesar by Warlord Games.

Gærstfeld is based on the Anglo-Saxon era of England.  It is a country consisting mostly of open, rolling plains run through with rivers and dotted with forests.  It is an idyllic countryside; ripe for farming and rich with resources such as wood from the forests, minerals from the mountains, and a long coastline with ample fisheries.


About a thousand years ago, Gærstfeld was a sparsely populated frontier with only a few small settlements.  During the great migration, however, many clans from the South and West came to this region in search of an opportunity at a better life.  The lush and fertile countryside, fed by several river systems running from the Westhealf mountains to the coast, provided ample opportunity for the migrating clans to settle and start anew.

The people of Gærstfeld are mostly common workers such as farmers, fishermen, woodsmen, and craftsmen.  The common folk are free, working for the betterment of their local villages, towns, and their families.  Communities generally share the produce of their efforts, and any surplus is traded to nearby settlements.  A certain taxation is in effect to the extent that the lord, or thegn, of each hold receives a portion of said produce and trade income so that he may use these to re-invest into his lands and ensure the stability of his holdings.

Each thegn may be in charge of a small village or rural region, or possibly just a small collection of farms or a mill.  There are thousands of thegns in Gærstfeld, and although these landowners are more wealthy than the common folk, or ceorls, they are by no means above working with their people.  A thegn may assert some level of local authority of law, but for the most part has no say beyond his small hold.

Above the rank of thegn is the bregu, or chief, a title left over from the old days of the nomadic clans.  The bregu may lord over ten or twenty thegns, who owe loyalty to their chief usually more from ties of kinship than any political agreement.  The bregu is in charge of maintaining the safety of the holds under his control and passing judgement over any disagreements or law breakers, and to serve this function may maintain an organized militia.  The bregu usually is also the chief authority in most minor trading towns, and the thegns under his dominion usually oversee smaller settlements that trade with the bregu's town.

The bregu, in turn, owe loyalty to an ealdorman.  Each ealdorman is in charge of what is the lowest official political region, the ealde.  Each ealdorman may maintain a fortified keep and a standing garrison.  Around these usually there has developed larger towns or small cities.  The ealdorman will also be the governing figure in these settlements.  The ealdorman is answerable to his cyning, or king, and is responsible not only for maintaining order in his own ealde, but may be called upon to raise and lead a military force when the cyning summons him.

Each cyning inherited his role from ancestral high chiefs who conquered, settled, or otherwise came to control vast swathes of land.  Each of these demarcations is called a folde, and to this day operates mostly independently.  Two foldes may come to blows over a disagreement, but the conflict must be kept brief and the loss of life to a minimum, lest the high king, or cynehláford, become involved.  The foldes of Gærstfeld each used to be its own kingdom, but over two hundred years ago they were united by Bældon The Wise, the first high king.  Since then, each cyning still rules his folde and maintains his own standing army, but owes allegiance to the high king.  

There are seven foldes in Gærstfeld:  Pearroc, Dunland, Eteland, Gelenda, Bocland, Stródland, and Eardland.  Pearroc is sparsely populated and is characterized by harsh winters.  Dunland is a land of rocky foothills near the Westhealf mountains and is the main producer of mineral resources.  Eteland is, like Pearroc, not very heavily populated and consists mostly of coastal farming and fishing settlements.  Gelenda is one of the more prosperous of the foldes, and is known for it's abundantly rich farmlands.  Bocland is the seat of the cynehláford, or high king, and the center of government for the region.  It also boasts bountiful farmland and prosperous stone quarries near the plains of Eardland.  Eardland itself is the least populated and organized of the foldes, still consisting mostly of the old clan structures and not holding to the typical governmental structures as the other foldes.  There are few ealdormen here, mostly in the lands closer to Bocland, and through most of the folde the bregu is the chief authority.  The people of Eardland are known as expert horsemen.  Stródland is a region of thick marshy forests run through with three rivers.  There is not much farmland here, but the hunters and trappers of Stródland are without peer and many expert bowmen reside here.


The military of Gærstfeld is relatively small, as far as standing armies go.  Each king may have only a few hundred professional soldiers, and the ealdorman usually much less, closer to fifty.  The militia of the bregu may be full time or part time soldiers, usually the latter, and may number as few as a dozen men.  Each thegn, however, is required to maintain mail, helm, shield, sword, and spear for himself and to ensure that all able bodied men under his authority are armed with a shield and spear or javelins.  By doing this, the actual military might of Gærstfeld may be measured in the number of adult men who are fit enough to fight.  All men are trained to fight in the shield wall, a formation of interlocking shields which creates a defensive bulwark of humanity bristling with spear points.  Each man may not be a highly skilled warrior, but with hundreds of men side by side behind their shields, they must only stand their ground.

Thus concludes our brief overview of the geography, history, politics, and military of Gærstfeld.  This is just the beginning, however, and I anticipate developing this project further.

Tuesday, March 29, 2016

The Aetts of Odálegaard

I wrote "Introduction to Odálegaard", a couple of weeks ago discussing my Imagi-Nation of Odálegaard. I briefly mentioned the Nine Aetts of Odálegaard, which serve as providences or states in the greater kingdom. The shields will each be unique to the warrior, but using the same colours of their clan. This post mostly serves as a reference guide, and I will be making a separate page for the kingdoms.

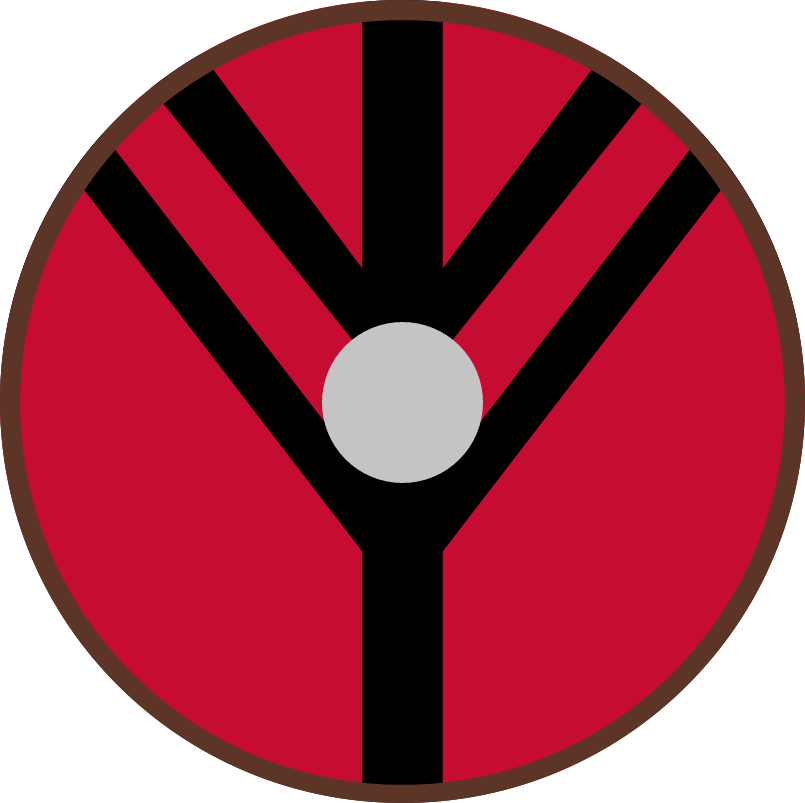
The Theodulfings are the "royal" family or house. The patriarch is King Saemund Sinfjoltison and the matriarch is Queen Jorunn Asgaardottir. Their capital is the town of Skalhalla. The clan colours are red and black.
The Gaedalings make their capital at Jokullgar. The heads of the Gaedalings are, Jarl Enjar Rolloson and his wife Jarlkona Elena. Their colours are blue and light blue.
The Eydisungs are a strange clan, as they are ruled by Jarl Josefin Stelladottir, a shieldmaiden. Their capital is Kalda. Their clan colours are green and black.

The Hallgrimings are ruled by Jarl Vargstor Snake-Eater, and Jarlkona Ashilda Aslaugdottir. Their capital is Helgafjall. Their colours are brown and green.

The Hrafnungs are lead by Jarl Raindolf Eerikson and Jarlkona Freygerd Gætirdottir. Their Capital is Fljotenby, and their colours are gold and blue.

The heads of the Ornulfings are Jarl Kamik Alpison and Jarlkona Asny Svendottir. Their capital is Norholt. Their colours are grey and teal.

The Gundmundungs are lead by Jarl Teodor Halfshield and his wife, Jarlkona Aldis Sigewulfdottir. Their Capital is Reykjadalr. Their colours are black and blue.

The Waltheofungs are lead by Jarl Urho Nardson and Jarlkona Ragnfrid Ottardottir. Their capital is Hafrsdalr. Their colours are white and red.

The Folkmarungs are lead by Velnar Gustavson and Jarlkona Yngvild Finndottir. Their capital is Jotunnmar. Their colours are brown and red.

Sunday, March 27, 2016

Galen's Thoughts: Reaper Bones Miniatures

DISCLAIMER: THIS IS NOT A REVIEW! THESE ARE MY OWN THOUGHTS AND OPINIONS. I LIKE REAPER MINIATURES AND HAVE SEVERAL BONES THAT HAVE HAD LOTS OF FUN PAINTING!
So in the past few years Reaper Miniatuers has kickstarted their newest line of miniatures, "Bones". They are plastic minis that come in a white colour, hence the name. Their three Kick-starters have been wildly successful, and for good reason. The Bones Miniatures are incredibly cheap and numerous.  I've backed two of the three Kick-starters and haven't regretted it. But I do have a few complaints.

The miniatures are of a soft plastic which is somewhat similar (based on my own opinions) to the pre-painted models that Wizards puts out. They are easily bent and very easy to cut up, making them great for conversions. But what I don't like is how hard it can be to get the miniatures to straighten, even with the tried and true: heat and chill method. (For those unfamiliar with the method, here is an article). For me, who is currently working on a massive commission of Bones, it can be a pain to do hundreds of minis; and some just won't stay in the position I placed them in.

Now, since I've been painting literally hundreds of the things, here is my biggest complaint. The models have an immense variety of sculpt quality! Oh the lamentations! Some like the Pathfinder RPG models, are beautiful! and I can't explain how nice they look when painted. But then there are some where I have trouble distinguishing where certain details begin and end. I'd like to think I'm a somewhat decent painter with good eyesight, but I hate having to fabricate details on a mini.

Another problem I have with them is the annoyance that is removing mold lines. I have many variations of files to clean mold lines off models. They work fantastically with the Metal, Hard Plastic, and Resin models that I have painted; but due to the soft plastic of the Bones, it doesn't work so well. The recommended method is using a hobby knife or Exact-o to clear the mold lines. Again the soft plastic is easily cut and you need a steady hand to do this. It's also very time consuming.  So with my commission I've opted to not clean mold lines. Ive told the customer that due to the vast number and variation of the models, they aren't going to be winning any painting contests. They are painted to a table top standard; which is perfectly okay.

In summation, I like the Bones models. Do I prefer them? No. But I see them as a way to get a bunch of minis for a low price, which is great for beginner GMs and painters. I've used Bones to practice new techniques with out messing up on a more expensive model.  So I don't hate the Bones miniature line. I just would much rather paint and model with other mediums.

Thursday, March 10, 2016

Introduction to Odálegaard

So creating your own world is a mainstay of Tabletop Roleplaying games since their conception. As someone who has shelves full of RPG books and am working on finishing my first book; I'm very familiar with the concept. The idea never really crossed my mind in another one of my hobbies, Wargaming, until I read an article titled, "Imagi-Nations" in Issue 340 of Wargames Illustrated. The article's author, Charles S. Grant takes us through the story of how he fought conflicts against his father using the nations 'Lorraine", and 'Vereinigte Freie Städe' or 'VFS' for short.

I'm a big fan of World Building so, this article sparked my imagination. I had never even considered coming up with my own Nation to wargame with. Thus I took to the internet to learn more about these "Imagi-Nations".

Much to my disappointment, I found that most "Imagi-Nations" existed in the Horse and Musket/Napoleonic Era. I'm not a huge fan of the period, favoring the WWII Era and the Dark Ages above all else.

Now, recently I've been building up my forces for Warlord Games' "Hail Caesar". Our group is small so far (literally me an one other person), with me pushing Bolt Action (Another Warlord game) heavily opposed to Hail Caesar. I mentioned this article to the other player and suggested that we come up with our own Imagi-Nations for our Dark Age battles. He agreed and thus began the creation of Odálegaard.

*****
Odálegaard draws inspiration from the Viking clans and Kingdoms during the Dark Ages. The name itself is derived from Icelandic 'ódauðlegur', meaning 'immortal', and 'gardur' meaning 'garden'; so "Garden of Immortals. I came up with the name based on a song by Manowar called "Army of the Immortals". Being a big Manowar fan, it seemed appropriate.

I sketched up a map that's based on the coastlines of Norway and Dennmark, which displays major settlements, mountains and Rivers. From there I named my monarchs, King Saemund Sinfjoltison and Queen Jorunn Asgaardottir, and named the town, Skalhalla as the capital.

Now that I had a ruler I needed to come up with states, provinces, or regions of my budding nation. I decided to use the Nordic idea of Aetts or clans. I divided up my lands based on the major major settlements and came up with the Nine Aetts of Odálegaard. With this each aett needs a jarl, so I gave names to these people.

For my actual models I decided to have individual shield designs to distinguish the various clans. So each aett would have their basic colour scheme (the Jarl's family would have the same design), with each warrior having his own design.

That's the extent of my creative efforts so far, but I for certain will be coming up with more information as my army grows.